")

Top Mistakes to Avoid When Painting Kitchen Cabinets Yourself
Painting kitchen cabinets on your own can rejuvenate your area inexpensively. However, it’s simple to falter. Frequent slip-ups may result in flaking coats, patchy surfaces, or squandered time. This manual pinpoints the chief errors to steer clear of when handling this do-it-yourself task. From groundwork to completion, dodge these traps. That way, you’ll secure a polished appearance that endures, even without a professional’s aid.
Skipping Proper Preparation
Groundwork forms the foundation of a triumphant cabinet painting endeavor. Hurrying or bypassing it ranks as a common misstep.
- Not Washing: Oil and dirt accumulation blocks paint from sticking. Wash carefully with a grease remover before you begin.
- Overlooking Sanding: Unsmoothed areas repel paint. This leads to shedding. Sand gently to even out timber or aged layers.
- Neglecting Primer: Omitting primer on bare wood or shiny units causes spotty results. Apply a reliable primer for hold.
Solid prep guarantees your paint adheres and persists. Avoid taking shortcuts here. Thorough cleaning removes hidden grime. Plus, sanding creates a grip-friendly base. Primer seals the deal, locking in your efforts.
Choosing the Wrong Paint Type
The coating you select greatly shapes your cabinets’ sturdiness and style. An unwise pick turns into an expensive blunder.
- Using Room Paint: Wall coatings lack the resilience needed for cabinets. They splinter quickly with regular use.
- Disregarding Sheen: Dull sheens reveal fingerprints. Shiny ones spotlight blemishes. Satin or semi-shiny offers a middle ground for kitchens.
- Bypassing Strength: Low-cost paints dim or flake soon. Choose paints made for cabinets or top-tier water-based varieties.
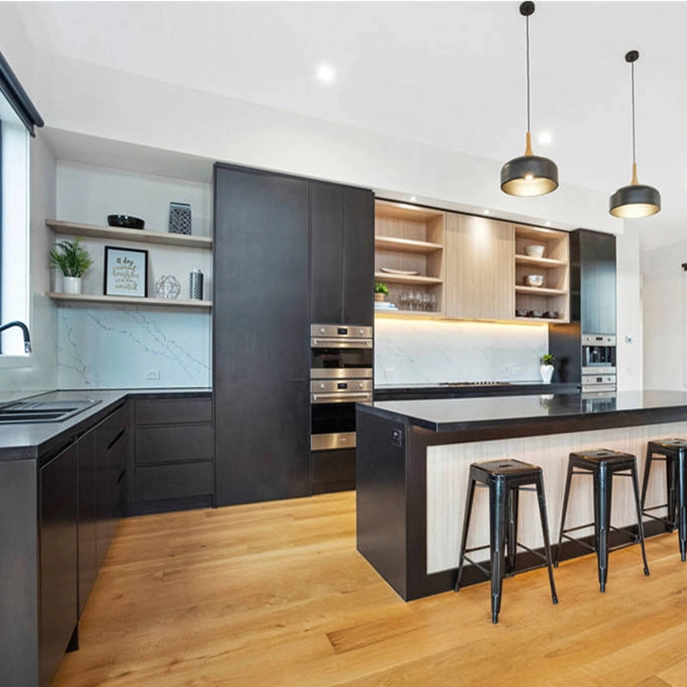
For ideas, peek at tough finishes like those in the L-Shape Black Lacquer Kitchen. Its look proves what’s achievable with a smart choice. Picking wisely saves you rework later. Durability matters in a busy kitchen.
Overlooking Brush and Roller Quality
Your gear molds the result. Inferior brushes or rollers spoil even the finest coating on cabinets.
- Poor Brushes: They create lines or shed hairs into the surface. Buy artificial brushes for even swipes.
- Mismatched Rollers: Spongy rollers may puff up. Rough ones leave bumps. Opt for tiny, dense foam rollers for smooth panels.
- Lacking Range: One device doesn’t suit every cabinet section. Combine rollers for flat parts with brushes for corners.
Good tools stop irritation. They yield a refined, expert finish. Cheap options waste paint and time. Invest once for better outcomes.
Applying Paint Too Thickly
Heavy layers feel like a fast track. Yet, they wreck your cabinet task swiftly.
- Drops and Streaks: Thick applications trickle, leaving ugly traces. Use slim, steady coats instead.
- Slow Drying: Bulky paint lingers wet for hours. This invites dust or marks. Steady light layers reward waiting.
- Splitting Danger: Overpacked paint might split when drying. Layer slowly for a firm outcome.
Slim coats demand more time. Still, they promise your cabinets gleam perfectly. Rushing leads to flaws. Patience here is your ally.
Neglecting Drying and Curing Time
Hastening drying phases is a novice slip that ruins diligence on kitchen cabinets.
- Touching Early: Damp paint smears if handled soon. Pause at least 4-6 hours between layers.
- Reattaching Too Fast: Doors remounted quickly may cling or buckle. Allow 24-48 hours for curing first.
- Ignoring Full Hardening: Paint requires 2-4 weeks to set completely. Limit heavy handling until then.
Honor drying periods for a durable cabinet refresh. Speed courts trouble. Each coat needs its moment. Full curing locks in resilience.
Painting Over Hardware or Hinges
Keeping fixtures on while painting yields a messy, rough finish on cabinets.
- Untidy Borders: Paint creeps under hinges or handles, spoiling crisp edges. Detach all pieces first.
- Frozen Bits: Hardened paint can seal hinges shut. Remove them to preserve use.
- Patchy Layers: Fixtures block paint, leaving gaps. Take apart units for total reach.
Clearing cabinets fully before painting assures a neat result. Don’t bypass this. Disassembly takes effort, but it pays off.
Ignoring Environmental Factors
Your kitchen’s surroundings sway how paint sets. Disregarding them brings lackluster cabinet outcomes.
- Wet Air: Dampness drags out drying and sparks bubbles. Coat on dry days or run a dehumidifier.
- Dust and Bits: Floating specks cling to fresh paint. Paint in a tidy, closed-off spot.
- Heat or Chill: Cold stalls drying. Heat rushes it too much. Target 60-75°F for ideal conditions.
Master your space to shield your cabinet paint work. Weather can trick you. Control it, and your finish thrives.
Misjudging Color and Finish Choices
Hue and sheen errors can throw off your cabinet painting dream quickly.
- Not Sampling: A tone shifts on cabinets versus in a tin. Try it on a tiny patch first.
- Fad Risks: Loud hues age fast. Soft shades, like in the White Lacquer Open Kitchen, hold timeless charm.
- Sheen Errors: Glossy sheens show flaws. Flat ones catch dirt. Semi-gloss works for most kitchens.
Pick shrewdly. Your cabinets’ appeal rests on this call. Test runs avoid regrets. Neutral tones offer staying power.
Forgetting to Seal the Finish
Skipping a topcoat leaves your newly coated cabinets exposed.
- No Shield: Bare paint erodes from drips or scrapes. A clear sealant adds defense.
- Color Fade: Sun rays bleach hues without a barrier. Use polyurethane for staying power.
- Mark Trouble: Kitchens turn chaotic. Unsealed areas mark easily. Seal to fend off grease and spills.
A topcoat secures your labor. Don’t let cabinets dull too soon. Sealing takes extra steps. Yet, it’s worth it for protection.
Refor Furniture: Your Kitchen Cabinet Supplier
For those craving ideas or prebuilt answers, Refor Furniture stands out as a prime provider. Refor Furniture hails from Shandong, China. They excel in crafting sturdy, chic kitchen cabinets. With decades shipping to the U.S., Europe, and more, they deliver lasting, trendy choices. These ease DIY woes while fitting today’s kitchen desires.
FAQs on Painting Kitchen Cabinets Mistakes
1. Why does my paint flake after coating cabinets?
Flaking often comes from weak prep—like missing sanding or primer—or picking the wrong coating. Wash, sand, and prime well. Then, use paint made for cabinets.
2. How many layers do cabinets require?
Usually, two to three slim layers provide full coverage and toughness. Thick lone coats drip and fracture. So, stack them bit by bit.
3. Can I coat cabinets without sanding?
Yes, but it hazards sticking problems, especially on sleek surfaces. Sanding scuffs the base for better hold. Skip it only with a potent bonding primer.
Conclusion
Painting kitchen cabinets yourself cuts costs but needs caution to evade errors. Dodge skipping groundwork, choosing unfit coatings, or rushing drying spans for a sturdy finish. Every move—from gear to sealing—counts for victory. Want a perfect model? View the Modern Kitchen Cabinet with Island or head to Refor Furniture for expert-level picks. Avoid these snags, and your DIY task will glow. Take time to plan each phase. Test tools and hues before diving in. Your kitchen deserves a lasting lift, so sidestep haste and aim for precision.


