")

How to Paint Kitchen Cabinets in 5 Steps
Removing and cleaning your cabinet doors is key before diving into the painting process for that polished look. In this blog post, you’ll find tips on prepping your cabinets and getting hold of the necessary tools to start your painting project with assurance.
Detach and Clean Your Cabinet Doors
Renovating your kitchen cabinets via painting will sure provide your kitchen with a fresher look without spending on the entire renovation job. Prior to embarking on the painting itself, it’s crucial to begin by taking down and cleaning completely your cabinet doors.
Gathering Necessary Tools and Materials
Make sure you have all the tools and supplies before you begin. Screwdrivers to take off hardware parts and cleaning items like degreaser and sandpaper for prep work plus paint and brushes for the finishing touches! Remember your gloves and masks.
Cleaning and Degreasing Cabinets
When painting cabinets, it’s important to start by cleaning them with a degreaser to get rid of any grease and dirt buildup, from the surfaces. Matte lacquer-finished cabinets are robust and easy to clean when dealing with surface dirt. Make sure to eliminate all residues for a surface before sandpaper is used.
Removing Hardware and Doors
Take out all the hardware from the cabinets, like handles and hinges to paint them evenly over. Refor Furniture prioritizes quality improvement by making sure that the parts can be detached easily without causing any harm to the structure.
Properly Sand Kitchen Cabinets Door
In order to achieve a finish that enables the primer and paint to stick well sanding is a crucial step.
Selecting the Right Sandpaper Grit
Selecting the sandpaper grit, for your cabinets is crucial. Add medium-grit sandpaper ( 120 to 150 grit)during the initial sanding phase to eliminate any current finish or flaws.
Techniques for Even Sanding
Smooth the sandpaper gently along the wood grain to prevent any scratches or marks on the surface while sandpaper work is in progress and the edges are carefully sealed to provide protection, against moisture which increases durability when sandpaper work is done.
Addressing Imperfections and Repairs
Check your cupboards for any flaws and damages before you start priming them. Painted cupboards are simple to clean make sure to get rid of all the dust after sanding them down.
Prime Cabinets Before Painting
Preparing the surface before painting is crucial, for ensuring adhesion and a smooth finish.
Choosing the Appropriate Primer
Choose a primer that matches your cabinet material. An oil-based primer is great, for wood surfaces and shellac-based primers work well for covering stains.
Application Methods for Priming
Make sure to use a brush or roller thats ideal for finishes when applying the primer layer.
Drying Time Considerations
Make sure to follow the manufacturer’s instructions on drying times, between primer coats allowing each layer to bond effectively before you start painting.
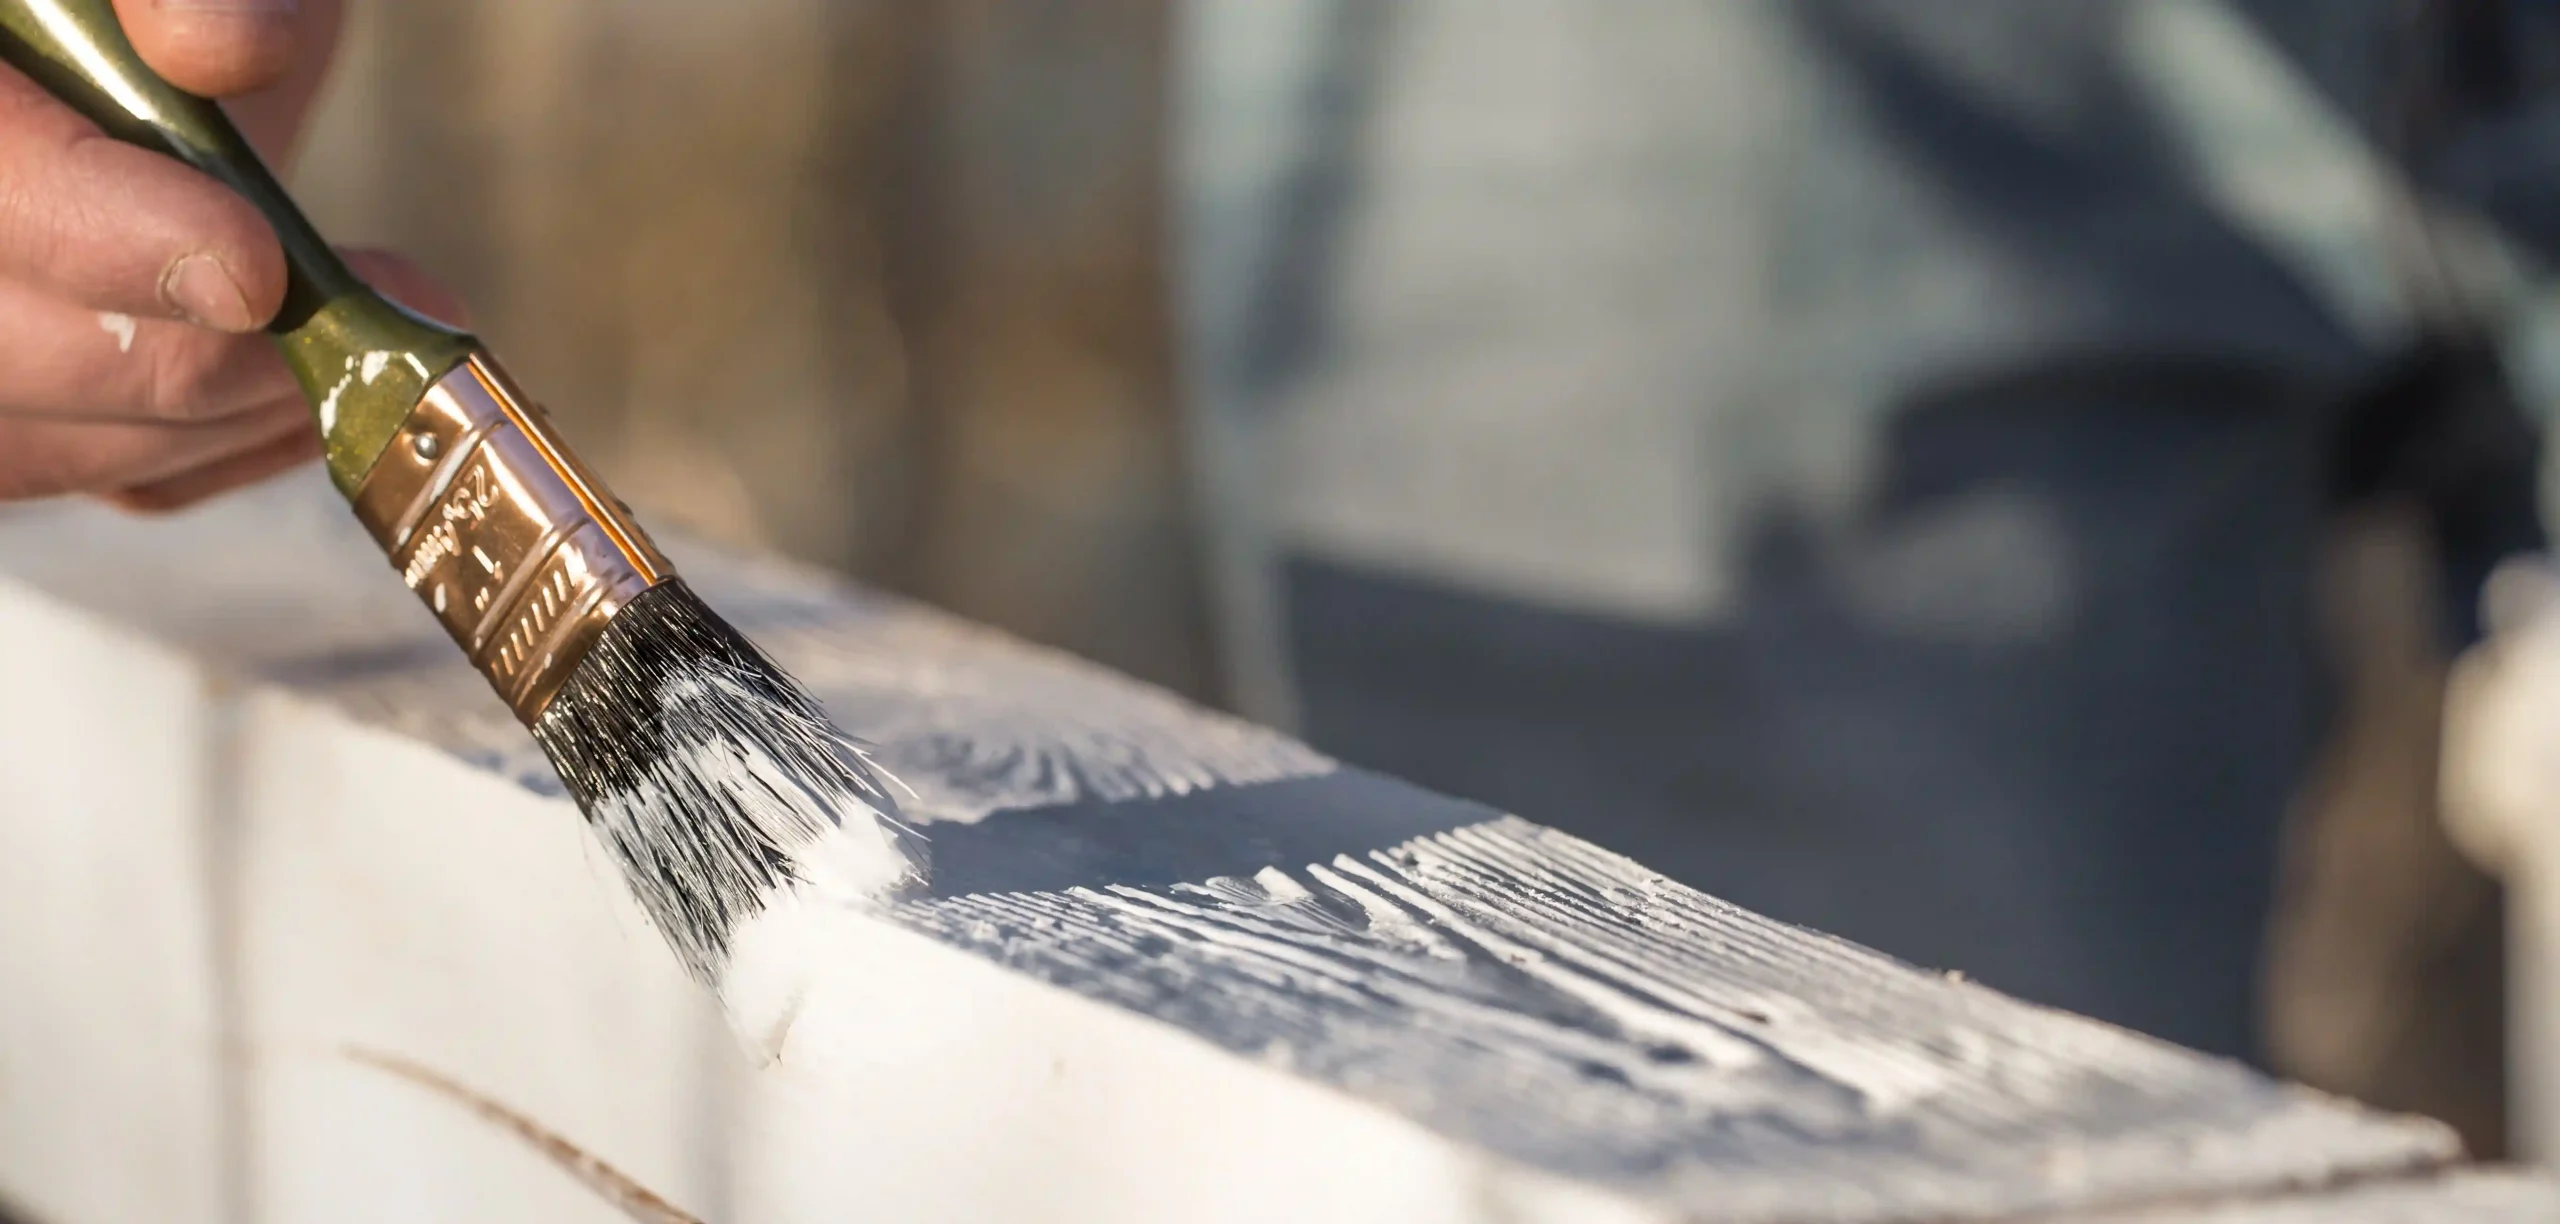
Apply Paint to Kitchen Cabinets Effectively
After you have prepared the surface properly for painting with attention to detail and care.
Selecting the Right Paint and Finish
Opt for top-notch paint that is meant for cabinets in particular when it comes to renovating your kitchen cabinets with a high gloss finish! Cherry reds and deep forest greens are choices for this style of cabinets along with midnight blues in the mix too. Keep in mind that opting for custom colors might pose a challenge due, to the complexities involved in tinting them to perfection.
Techniques for Smooth Application
Apply strokes using either a brush or roller to attain a sleek outcome. Our lacquer board is offered in 213 shades for an appearance; strive for uniformity, on all surfaces.
Layering Coats for Durability
To ensure the longevity of your painted cabinets and enhance durability apply several thin layers of paint instead of one thick coat. Allow each layer to dry completely before adding the next result in paintwork, then dry door panels at room temperature.
Following these steps outlined here in detail guarantees that your kitchen cabinetry will achieve a polished look that enhances both the visual appeal and practicality of your living area.

Reassemble and Maintain Painted Cabinets
Once you finish painting the cabinets Take your time to put them together properly So they keep looking fresh and work as well as before
Reattaching Hardware and Doors
Start by reattaching all the hardware that was taken off before painting the cabinet doors using the screwdrivers and tools you collected earlier to secure handles and hinges back in place along, with any components needed for assembly. Refor Furniture prioritizes quality craftsmanship by designing components that can be easily removed without causing any harm to the structure. Align the doors accurately to guarantee function and a polished look.
Final Touches for a Professional Look
Check your painted cabinets carefully for any spots that might need fixing up a bit. Take a brush and fix any small flaws or areas where the paint might not be evenly spread. This focus, on details will make your cabinets look polished and expertly done. Think about adding knobs or pulls if you want to spruce up the look of your kitchen overall.
Maintenance Tips for Longevity
To ensure your painted cabinets stay beautiful over time, it’s important to clean them with a soft cloth or duster to remove dust and dirt easily. Avoid harsh chemicals or rough cleaners as they can harm the paint finish and choose gentle soap and water solutions when needed instead.
Why Choose Refor Furniture as Your Cabinet Supplier?
Refor Furniture sets itself apart as a choice for sourcing kitchen cabinets because of its dedication, to delivering high-quality products and exquisite craftsmanship.
Customization Options Available
Refor Furniture provides a selection of customization possibilities to meet your requirements effectively. Whenever you seek color schemes and finishes for your cabinet designs that resonate with your preferences and style preferences—our dedicated team is here to collaborate with you closely and bring your envisioned cabinet designs to life. We offer a lacquer panel in 213 vibrant colors that deliver a seamless appearance, across all surfaces for a cohesive and harmonious aesthetic outcome.
Conclusion
Repainting your kitchen cabinets can give your space a look, without breaking the bank! Just follow these steps; remove the doors and hardware sand the surfaces well apply primer evenly paint with attention to detail and reassemble everything thoughtfully for a professional finish that improves both the look and usability of your kitchen.
FAQs on Cabinet Painting
What Type of Paint is Best for Kitchen Cabinets?
When it comes to kitchen cabinets experts suggest opting for top-notch paint that is specially crafted for cabinetry. Such paints are known for their strength and ability to withstand moisture, which is particularly important, in a kitchen setting.
Can I Paint Over Stained Cabinets Without Sanding?
You can try painting over stained cabinets without sanding by using a high-adhesion primer; however, sanding is advised for results since it helps the primer and paint adhere better.
How Long Does it Take for Painted Cabinets to Cure Completely?
The drying period, for painted cabinets may differ based on the environment usually lasting around 7 to 14 days for the drying process. During this time it’s crucial to avoid subjecting painted surfaces to heavy use to prevent any potential damage.


